Never be afraid to paint outside the lines

Tag: true metallic metal (Page 1 of 2)

Posts with miniatures painted using the true metallic metal technique.

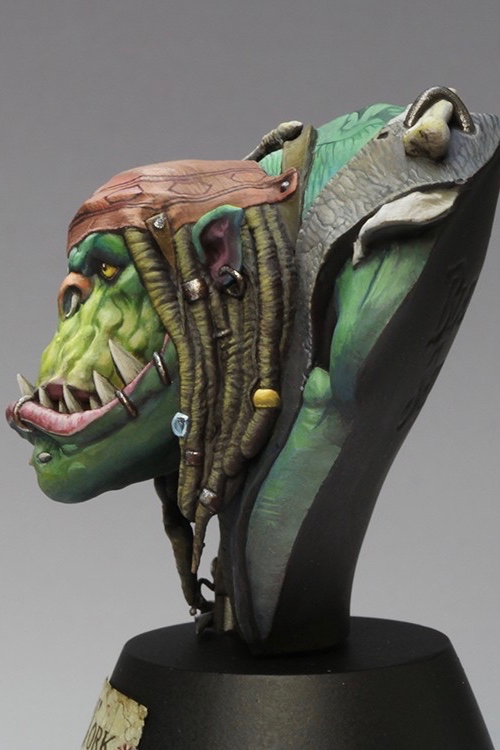
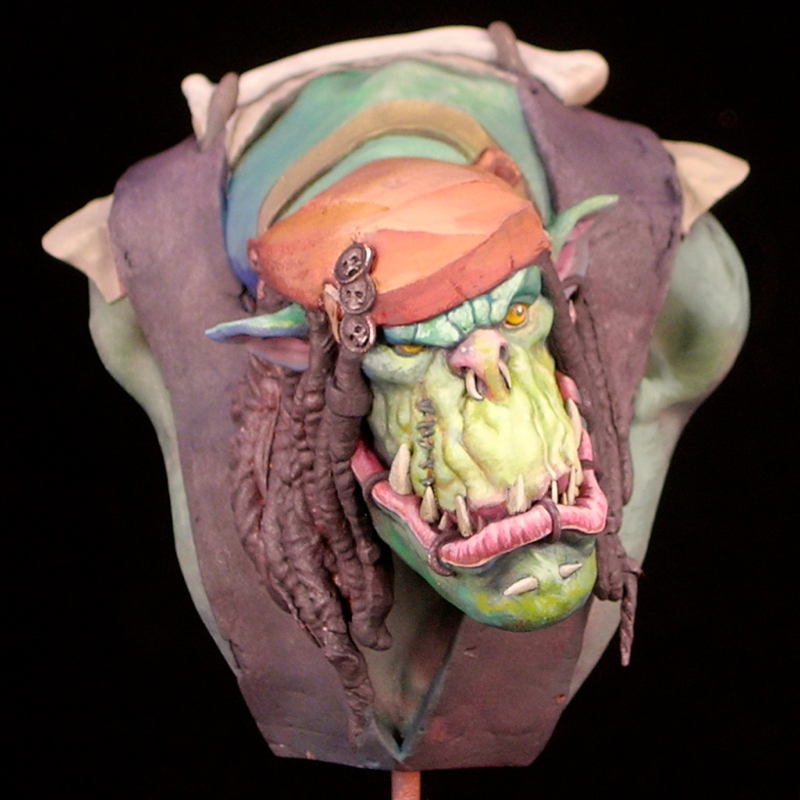
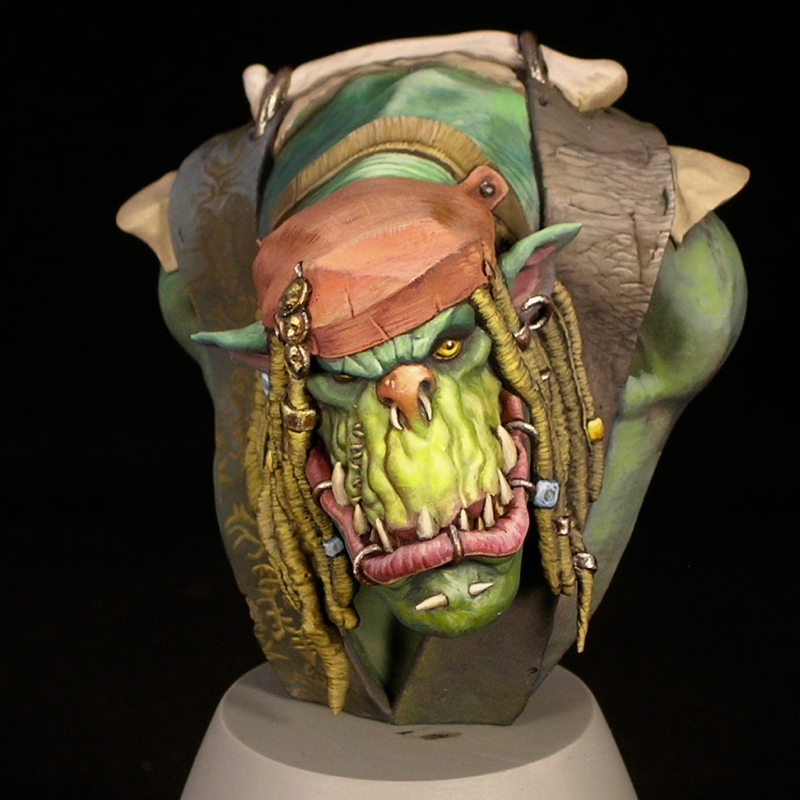
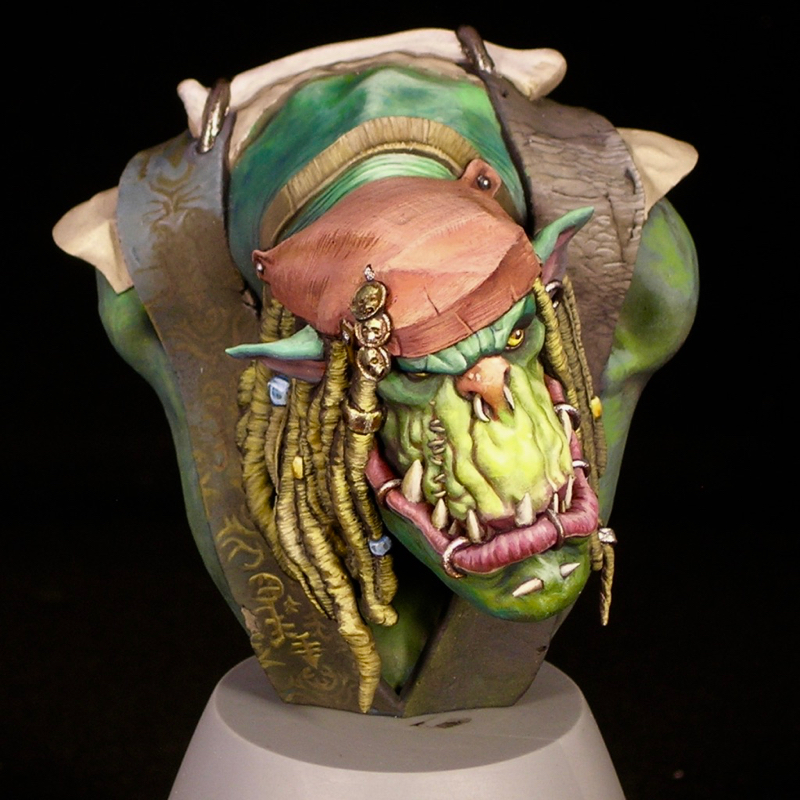
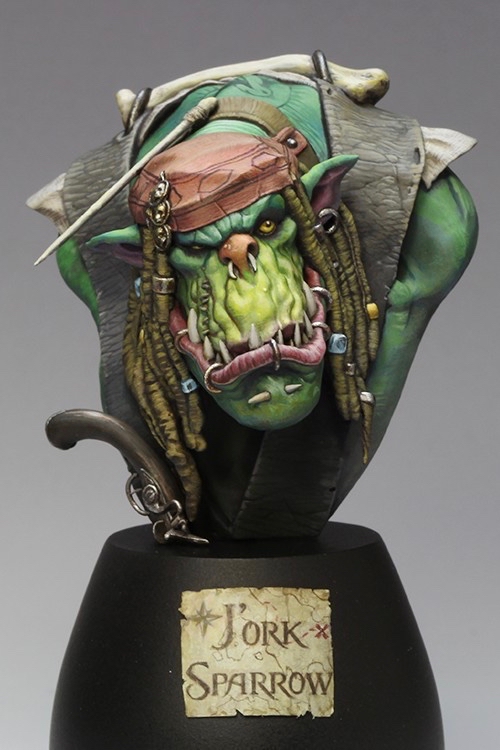
J’ork Sparrow

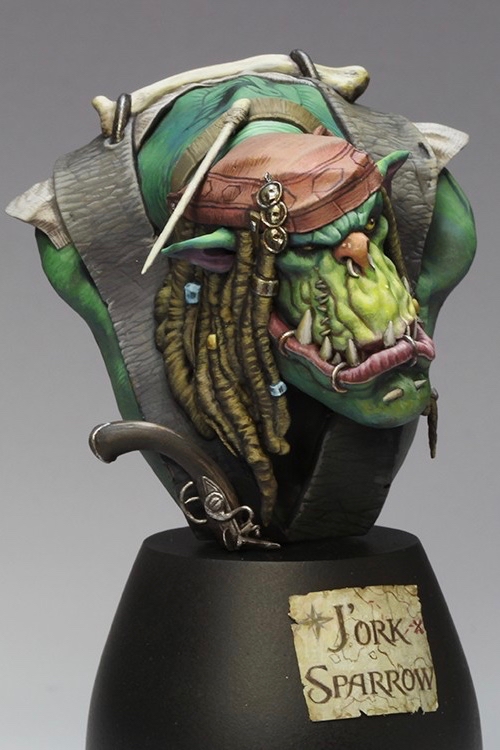
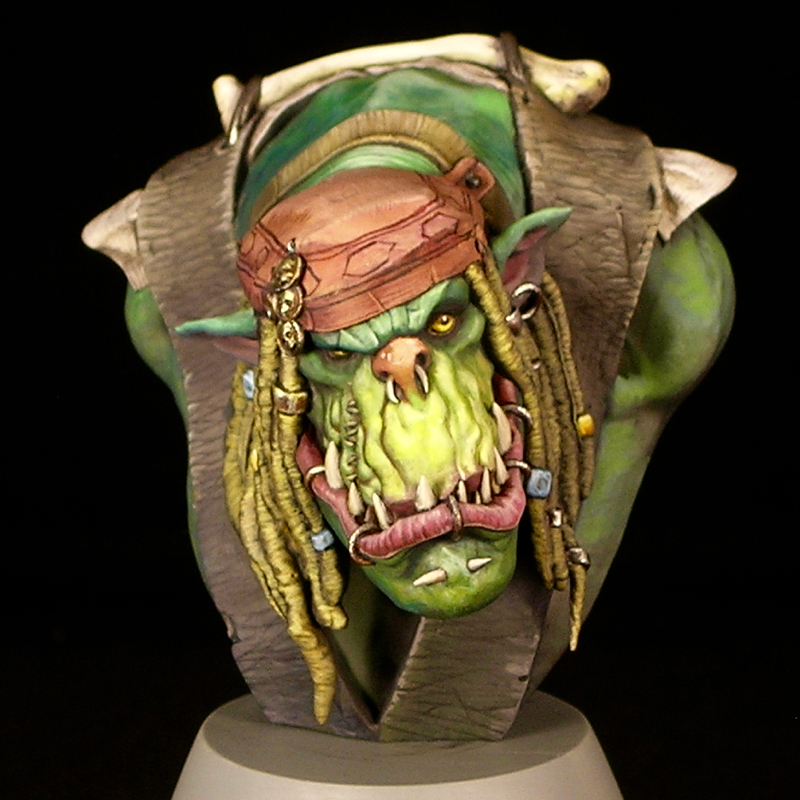
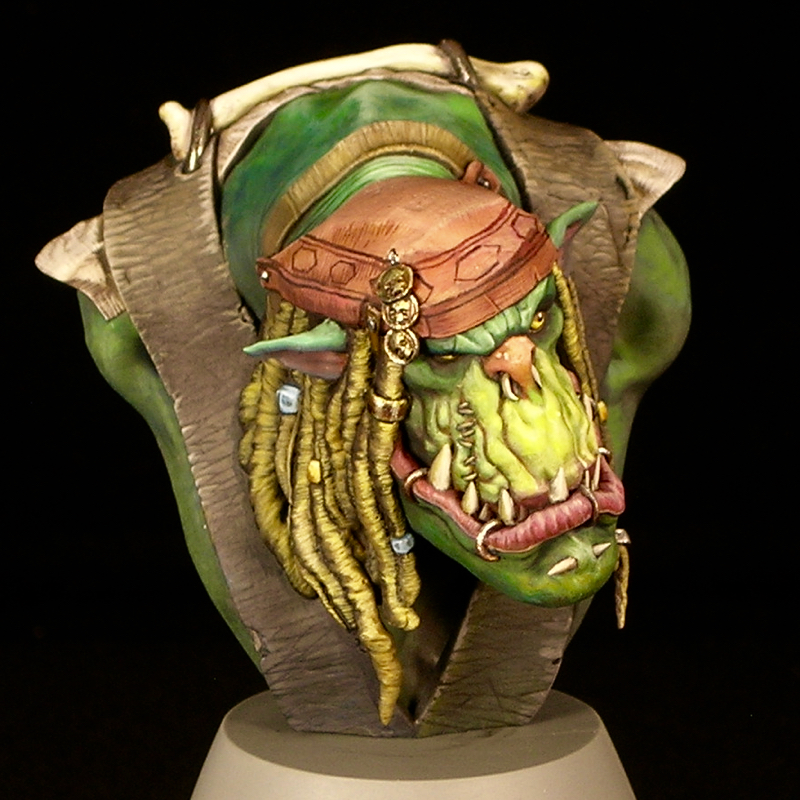
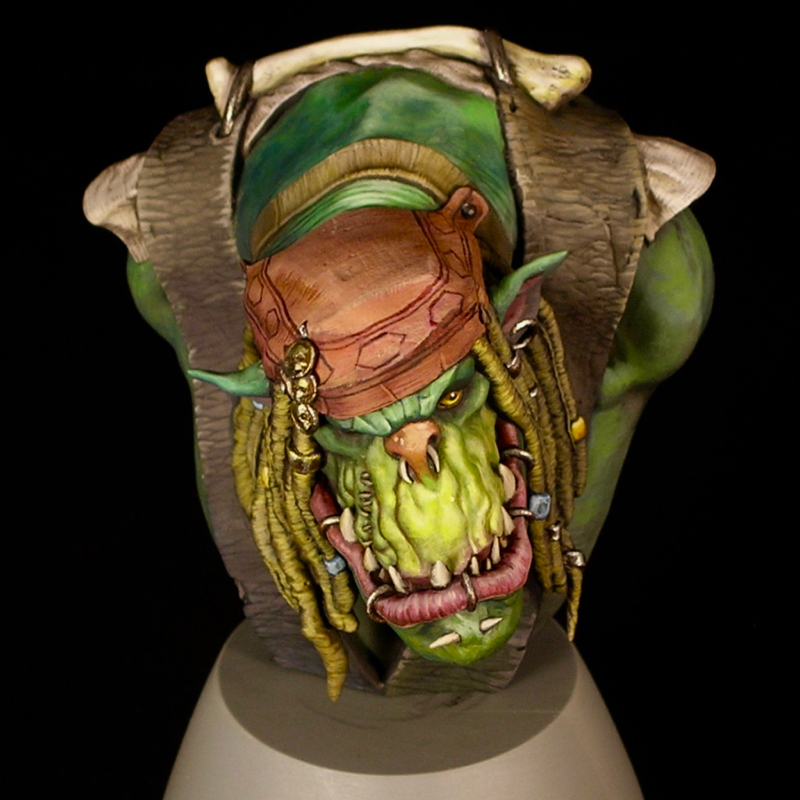
I finished J’ork Sparrow just in time for Crystal Brush—literally. I did a few final touches the day of the deadline, and was even painting at the airport a bit on the way to Chicago.

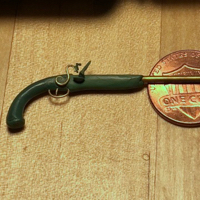
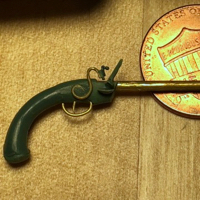
When I last posted about Mr. Sparrow, he was mostly finished, but still missing his flintlock pistol. That was the slowest part of the project, as I am the world’s slowest sculptor. It was fun though – in addition to checking flintlock reference photos, I also read up on how flintlocks work so I could accurately depict the mechanism. I depicted it ready for loading, with the hammer down and the frizzen open, which I think is appropriate for a holstered ‘lock—but please correct me if I’m mistaken!

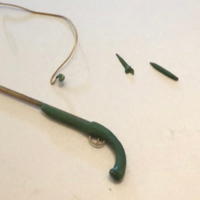
I sculpted more of the flintlock than I needed, so I could leave a crisp plane where I cut it off. I also sculpted the parts of the mechanism separately. This not only made it easier to get some of the shapes, it also let me glue on the pieces and have them really look like distinct parts.

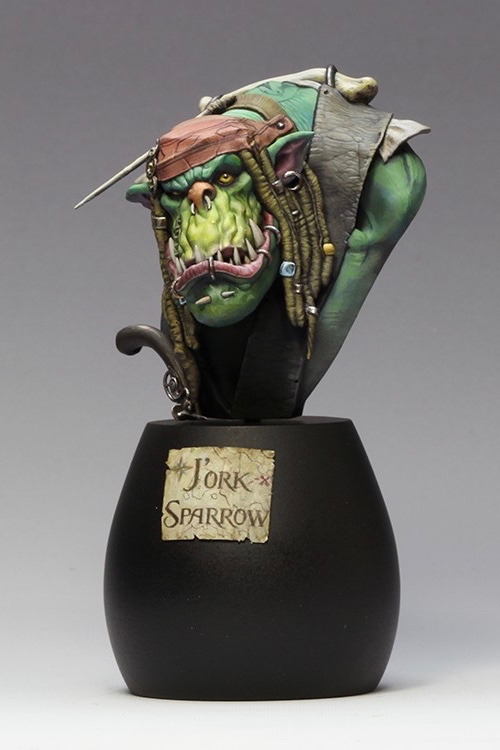
The other main element I added since the last WIP is the label on the base. I usually don’t place title plaques on my figures, but for this one I wanted to highlight the Jack Sparrow connection, and I also thought it would be fun to do a little treasure map as the label. The map is sculpted out of green stuff and torn slightly, in an attempt to get a naturally weathered appearance. The map and lettering are freehand, which is why my kerning is slightly off and my glyphs aren’t nearly as perfect as I’d like them to be. I’ve never been a good calligrapher.

I added a couple of other pieces to reinforce the Jack Sparrow connection: Jack’s sparrow tattoo, which also serves to add interest to the ork’s otherwise rather plain back, and the bone shard on his head, which was another very simple sculpt. Other than that, the only changes since the last WIP are a bit of refining here and there, and obviously much better photographs. They really do a wonderful job of photography at Crystal Brush, and my poor home photo setup cannot really compare.

I’m really pleased with how this piece came out in the end. I think the sculpted additions I made are both characterful and also help to add some interest to the silhouette, and I think the piece works well compositionally, with a face that really grabs and holds your focus, but enough interest elsewhere.

Voting links: Putty & Paint, CoolMiniOrNot

From the Workbench: J’ork Sparrow, part 2

I started J’ork Sparrow in November, and so far I’m quite happy with his progress.

In the November post, all I’d painted was his face and started blocking in the color of the bandanna. The next step was blocking in the remaining colors, so that at least no primer was visible. That way you can see the overall composition which helps keep things consistent as you refine the individual areas.

As with many of my recent works, J’ork is heavy on the textures. Because busts are a relatively much larger scale than other minis, you can depict surfaces with a much greater amount of detail, so it’s really important to depict the textures of the various materials as well as their shapes and colors. You can see the neck wrinkles, the weave if the fabric in the cap. I’ve even tried to replicate the texture of sun-bleached dreadlocks (which is not easy, I can tell you!)

I wasn’t quite sure how I wanted to do the vest, so I tried out two ideas, one on either side. One option was a slightly tattered fabric with gold embroidery on blue, similar to Jack Sparrow’s vest in the movie. The other was a more orkish vest, weathered and textured black leather. In the end I decided to go with the leather texture, and keep my freehand limited to J’ork’s cap.

Even more textures! In addition to settling on black leather for the vest and starting the freehand printed pattern on the cap, I’ve also done some subtle texturing on the bone and the white fabric, which helps differentiate them. It’s pretty subtle, but subtle details like that can add a lot of realism.

At this point all of the surfaces are done to an acceptable level of detail, and the bust is approaching where I could call it finished. However, I have one large step remaining, which is that I really want to equip him with a musket, in a holster attached to his vest. So there’s some sculpting to be done, as well, obviously, as more painting.

Other than that, the main remaining work is simply refining the details I have already established, making them crisper and easier to read, and fixing any mistakes until I’m 100% happy.

The White Orc

This is the third and final installment of my series on my entries into Crystal Brush. Make sure to check out part 1 and part 2.

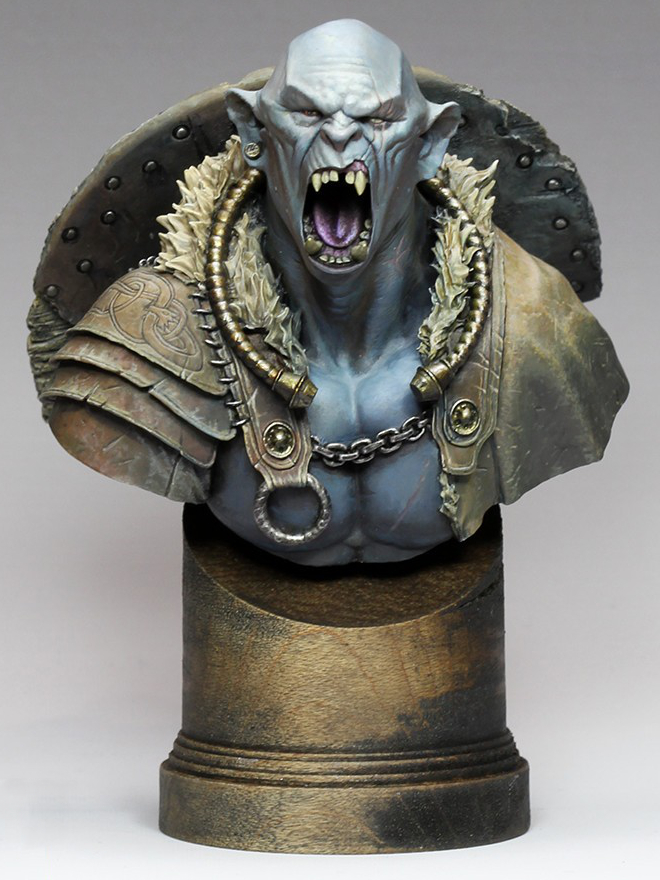
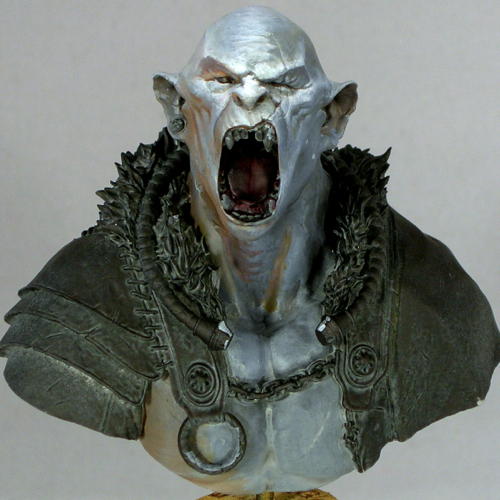
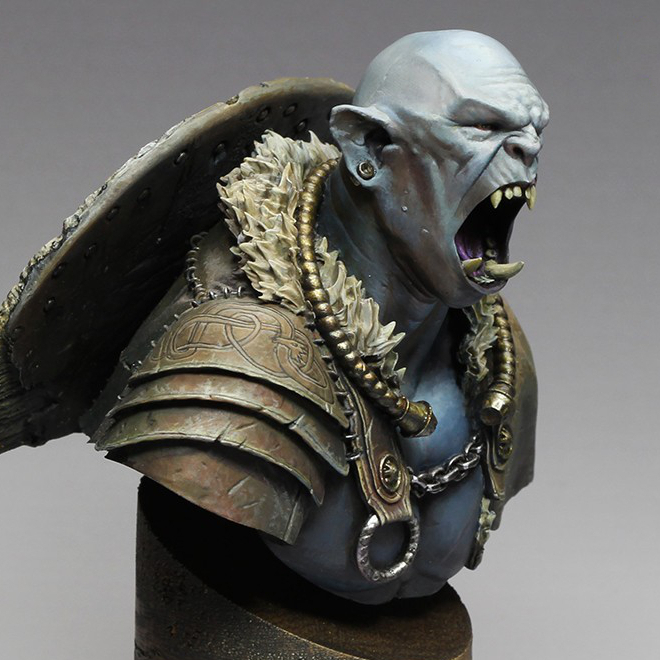
“The White Orc” was my main entry into the Crystal Brush competition this year, the one I spent by far the most time on.

Sometimes a miniature just goes right from the start, and this was one of those miniatures. I started the bust not long after taking a class with Alfonso Giraldes, and had a chance to watch him execute his style of sketching, and gradually turning the sketch into a finished painting. It was quite inspiring to watch, and I knew I wanted to have a go at it; this bust was the result.

I decided to paint the orc’s skin a light, neutral color that would be strongly influenced by his environment, and do a warm/cold ambiance. I really like complicated lighting situations, and study the way light is used in film in order to later recreate interesting situations with paint. Light neutral tones are perfect when you are playing with complicated lighting situations, since they will be most influenced by the light. I placed a strong white light almost directly overhead, with a warm ambiance from one side, and a cold ambiance on the other. The warm/cold contrast is extremely strong in the initial sketch. I eventually decided the contrast was too strong, and added more warmth to the cool side with some purple. The contrast is still quite apparent if you’re looking for it, but is now subtle enough that you might not notice it.

The shield was a lot of fun to paint, with all the battered wood texture. The freehand was one of the parts I struggled with a bit. I started out painting a bloody handprint, and it was just awful. I wasn’t the least bit happy with it, so started Googling alternative ideas for inspiration. Once I hit upon the idea of doing Celtic knot-work for the shield it all fell into place.

I like to get a lot of critiques on my miniatures, as other people often spot things I miss or have ideas I didn’t think of. One of the comments that kept coming up again and again in critiques was, the shield is too clean! So I kept dinging it up more and more. In the end, it ended up really with a really interesting weathered appearance.

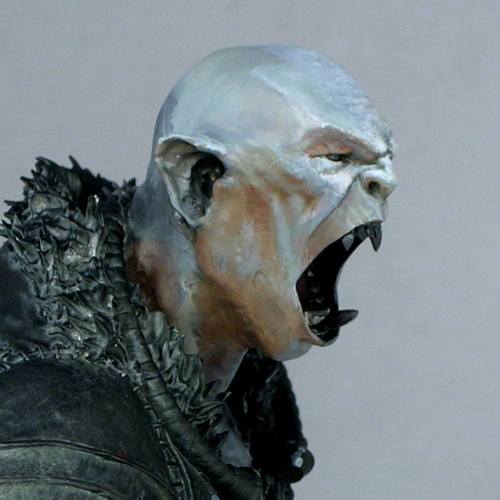
It’s interesting to compare the initial face sketch with the finished product. I actually left a lot of the sketchiness in, especially in the cheeks. I tend to focus a lot more effort on areas that are meant to be focal points—the forehead, eyes, and mouth in this case—and leave things sketchier in areas which are less important. That may have been a mistake in retrospect, since I think it was one of the things the judges dinged me for, and may be part of why he finished just out of the medals. (My understanding is he finished 4th in his category.) I do plan to fix a few things that were bugging me in the photos (mostly where the neck meets the chest) and then enter him in another competition, so hopefully he’ll win some awards before too long. But in the end, I paint for me, not for the judges.

On a more positive note, he’s currently my top ranked model on CoolMiniOrNot, and even made the top 10 of the year as the score fluctuated between 9.5 and 9.6. That made me pretty happy.

The bust is by Hera Models, which has a fantastic little line of sci-fi and fantasy busts. They also make Abalam, which I painted last year. The miniature is now sold out; apparently it sold out in the last couple of weeks, after I presented my own version at Crystal Brush. I like to think I sold at least a few copies, wink.

Even though this bust is sold out, Hera’s “academic orc” bust is still available, and is a modified version of the same bust, without the armor. I can definitely recommend it, as the face is extremely well sculpted and a joy to paint.

Voting links, for those so inclined:

Gurka Firewater

A lot of people get in to miniature painting through RPGs. When you play the same character weekly in a regular game, it’s a good motivation for painting a figure to represent the character, and doing a good job on it.

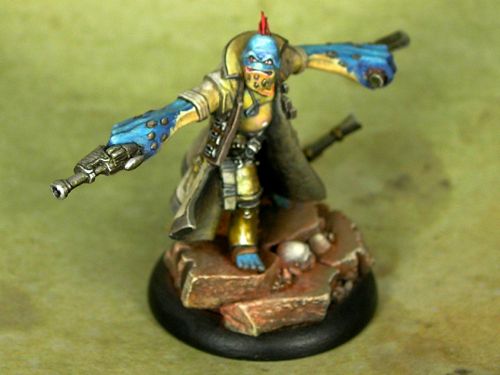
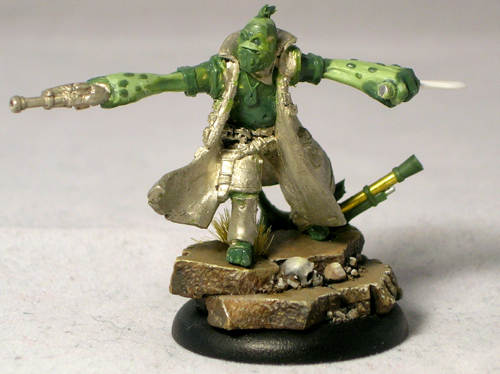
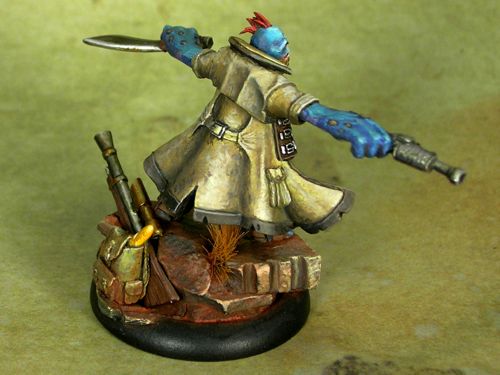
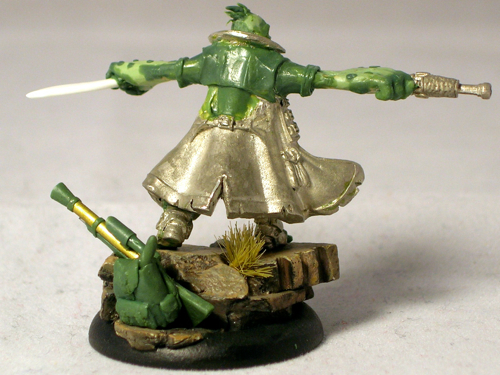
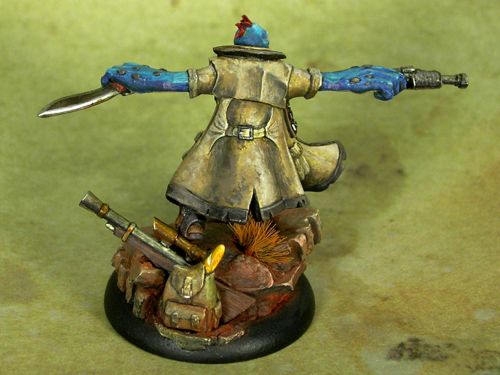
This is Gurka Firewater, my character in a weekly Unleashed game. I was disappointed with the available pygmy troll options in the Privateer Press miniatures line, so ended up converting my own, using Captain Allister Caine as the starting point. Since I started with a human figure, this involved extension conversion work.

The head, arms, and feet are full scratch. I sculpted one of the hands around one of Caine’s pistols, but the kukri and the rifle on the base are also fully scratchbuilt. I used a rotary tool to remove the head and grind down the breastplate so I could sculpt a troll belly over it.

Yes, that’s a baguette sticking out of his backpack. In the lore, trolls eat a lot and tend to carry food with them everywhere they go. I guess they’re sort of the hobbits of the Iron Kingdoms? A baguette seemed like a fun and fitting way of giving him some extra character. Perhaps I should also have added a flask, given his name. 😉

I ended up doing a very gritty paint-job with lots of texture. Somehow that seemed appropriate for a bushwhacker character. No smooth blending for this guy.

I entered Gurka in the “open” category at ReaperCon. Usually when I enter competitions, I use stock or near-stock models that are judged only on the quality of the painting. In the “open” category, they give roughly equal weight to both sculpting and painting, making it a much more challenging category. This is especially true for me, as I’m a much better painter than I am a sculptor. Luckily I was able to compensate somewhat for my sculpting deficiencies through my paintwork, and managed to eke out a gold medal.

It’s always good to push yourself, as that’s the best way to improve. With this miniature, I pushed myself to do a much larger amount of sculpting than I had before on any model, and that was definitely a challenge. But it also gave me the confidence to tackle more challenging sculpting projects in the future, since now I know I can do a project that involves significant sculpting, and still end up with a decent result.

Speed-painting!

I love speed-painting, both competitive speed-painting at conventions and just for fun at home. I think it’s great as a palette cleanser between longer projects. It’s a good way of getting playable, tabletop-quality figures on the table quickly, and allows you to focus on overall impact and feel rather than on getting all of the details perfect.

speedpaint_05

In speed-painting, the name of the game is high contrast, dramatic paintjobs which will catch the eye from a distance. Don’t try to make the mini look good up close, that’s just not something you can really accomplish in an hour of painting. Go for eye-catching techniques such as lighting effects and freehand, strong contrasts, and a passable face, and don’t worry about quality blending.

For Karzoug, I went for a strong lighting effect—the mini basically begs for it. The other versions I’ve seen use ordinary flame-colored flames, so for my version I opted for a more unnatural fire, as befits a necromancer.

speedpaint_06

Unlike the rest of the minis I’m showing today, Karzoug was not painted at a convention, so I actually got to give him a half-decent prep job instead of having to deal with giant mold-lines and dusty primer, and I got to use my own brushes. (Bringing your own sables to convention speed-painting events is generally considered cheating.)

speedpaint_11

Every convention has its own speed-painting rules, but the basic idea is that everyone is given the same miniature—contestants usually have no idea what it will be ahead of time—and have to paint it as well as they can within the time allotted. You normally get 45 minutes; championship rounds often last an hour. Use of personal materials is generally not permitted, so you’re sometimes painting with really terrible brushes, though sometimes you get lucky. Provided minis are assembled and primed (often not terribly well, since the people prepping them have several hundred other minis to prep and don’t care much about the end result). Getting a decent finished product in this environment is challenging, to say the least. So please don’t judge these minis too harshly. 🙂

speedpaint_10

Zombies make very good speed-paints. Messiness is usually inevitable, but on zombies it’s a plus. This zombie was painted in the speed-paint at KublaCon, which only provides contestants with one brush each. My favorite speed-painting technique being two-brush blending, I had to improvise. Fortunately, if you are sufficiently practiced, it is possible to two-brush blend with a single brush. 😛

speedpaint_03

I had the good fortune of painting this anteater twice, in two consecutive years of speed-painting at KublaCon. He is a tiny one-piece mini, produced by Zombiesmith who are great for always sponsoring KublaCon mini events. Small one-piece sculpts are ideal for speed-painting, because it’s very fast to cover the entire mini with paint. This gives you plenty of time to pull off more inventive  decorations such as freehand, and causes me to occasionally annoy other contestants as I wonder aloud, “What am I going to do with all this time?”

speedpaint_04

In the case of this anteater (technically a Quar) and his large flat back, that would be freehand decoration, of course. The first year I went with “hell angel” (it was faster and easier to leave off the esses, and still makes sense) and a pentagram, which seemed appropriate for a gun-toting bad-guy. The second year I wanted to do something different, so I ended up going in totally the opposite direction with a peace symbol on tie-dye. The idea cracked me up when I thought of it, so I hoped the judge would like it too. Both placed first in their respective rounds.

speedpaint_07

This is Kubla, con mascot for KublaCon. For the championship speed-paint round, they always use the convention figure, which is fun and gives you some extra time to plan (not that I ever remember to use it). This was not my best speed-paint however, and I only placed third that year (2015).

Karzoug, Runelord (Reaper), 75 minute speedpaint

I did much better in 2016, when I managed to win all four of the rounds I entered, including the championships. This grot was from the first round I entered, and was a great little blast from the past. He’s another tiny one-piece model,  so I had lots of time to freehand in horrible ’90s-style checkerboards and hazard stripes. I think it suits the model.

speedpaint_02

You can tell I spent way more time on the front than the back. Strategy!

Sadly this grot and the tie-dyed Quar are the only figures I managed to hang onto from KublaCon 2016. One figure I gave away, and the championship round figure I either misplaced or it, erm, wandered off.

speedpaint_08

Privateer Press’ gobber rogue, another tiny one-piece figure! This was from the speed-painting competition at Gen Con, which tends to be a bit more competitive than the speed-painting at KublaCon since it draws a bigger audience. I’m really happy with how the face and the rusted daggers came out, and I stole the idea for flowers on the base from another speed-painter. Sadly he only came in second, but that was enough to qualify me for the championship round… where I again came in second. Phooey!

speedpaint_12

And finally, this is perhaps my favorite speed-paint of all time. It’s a bit impressionistic, but I managed really strong contrasts and the overall colors work pretty well. I’m especially happy with how the rocket came out. One of my painter friends complained about the very visible brush-strokes on the back, but those were intentional, to show the gleam of the metal, and also a bit of the texture (if you look closely, you can see the brushstrokes are horizontal on the nose-cone and vertical along the shaft of the rocket).

speedpaint_13

This was from the Wyrd championship speed-paint at Gen Con, where I managed to finish first, beating the woman who beat me in the Privateer Press championships (and collecting a bounty!)

P.S. I promise to be back showing actually-well-painted models (and not just well-painted-for-45-minutes models) later this week. I have lots of minis from the Gen Con painting competitions that I’ve been dying to show off.
Abalám, revisited

When I posted Abalám on Putty & Paint, one of the comments I received was from Roman Lappat (of Massive Voodoo fame) who wrote,

Great piece. Love the light situation, even I think there are minor parts missing here and there, but this does not make the bust bad. If you want me to point out my thoughts about the light shot me an Emal 🙂

Let me just say I love this reaction. “I like this mini, but see some ways it could be better. I must tell the painter!” Constructive criticism is fantastic, and I’m thankful for all of it I can get, especially when it comes from as knowledgeable a source as Roman. As I wrote in Thoughts on painting competitions, constructive criticism is extremely valuable in improving your work.

When I emailed Roman, he sent me a very helpful diagram showing the areas he felt the light was missing or not strong enough.

Roman's critique

Armed with this sketch, my brush, and some red paint, I went back to my figure, and intensified.

abalam-before-after

Of course, the lighting is also rather different between the two photos. I’m terrible at miniature photography, sorry! I think the new pictures are somewhat closer to life, but this guy is really tricky to photograph.

abalam-revisit-5

I followed all but one of Roman’s suggestions, which was the back of the helmet. It’s just so recessed that I didn’t feel it would receive very much light, so the very strong light that Roman suggested would look out of place. Also, you have to be very careful painting lighting effects in heavily recessed areas of a miniature, because you are fighting against the shadows of the miniature itself. In the end, I did retouch the back of the helmet, but with a dull, dark red, instead of the strong effect that Roman suggested.

I did add light on the rivets, but it’s subtle, and hard to make out in these photos.

abalam-revisit-3

In addition to following Roman’s advice, I also intensified in some areas he didn’t highlight. I made the light on the neck much more dramatic, since it looked flat and poorly painted in the original. I added light on the lower-most armor plate, as that was one of the areas that lit up in my original study but where I had not added a glow effect. And I intensified the light on all of the ropes and the sash, and not only the parts Roman indicated.

Many people, when confronted with criticism, are resistant towards it, and try to find reasons to ignore it. I think this is a very good example of how one can benefit from not only being open to criticism, but trying to look further, and explore how you can use the insight in the criticism to improve upon things that the critique did not specifically identify.

abalam-revisit-4

Now that I’ve posted the back view, Roman’s probably going to point out all of the areas I’m missing here! I’m joking of course, but in truth, I think I can guess which areas he would point out.

I intentionally took a lot of shortcuts on the back, because a bust like this will normally be seen mostly from the front. Also, I have a policy never to retouch figures after they win awards!

abalam-revisit-2

I entered the bust into the KublaCon painting contest last weekend, and was fortunate enough to win Best in Show and one of the People’s Choice awards. This is my second KublaCon win in a row, as Tribe Chief Morrow won Best in Show last year. KublaCon is a Crystal Brush qualifier, which means that my award comes with round-trip airfare to Chicago for Crystal Brush. This will be my second time going, since I lived in Chicago for the first year of the competition, but moved away and missed the other years.

Word from the judges is that the decision between my entry and the second-place winner was very close. This just goes to show the importance of getting feedback on your work. Without Roman’s advice, I probably wouldn’t have won.

after

Thanks again, Roman!

Khador Extreme Battlegroup

I painted this group several years ago, but it took me a long time to take any decent photos (and even longer to remember that I did and get around to posting them, it seems).

khador_bg

This group won the best battlegroup award in Privateer Press’s 2014 Gen Con Grandmaster Painting Competition, and appeared in No Quarter 57. Unfortunately the picture taken by Privateer Press at the convention wasn’t that great. You can see it in my battle damage tutorial, which goes over the technique I used to damage the ‘jacks.

khador_destroyer_1

Then again, since it took me over two years to finally take decent photos of my own, I probably shouldn’t be complaining about what Privateer Press could do in the middle of a busy convention. Subtle white shading is hard to photograph, and the metallic work is even harder to photograph.

khador_destroyer_2

I’m really happy with how the metals turned out, especially the axe blades. Since the axes on the extreme ‘jacks are really big and flat, I knew I needed to do something to make them more interesting to look at. Painting them involved a lot of time-consuming back and forth between painting scratches and glazing over everything with inks, but the end result was worth the effort.

khador_destroyer_3

I had half of a hunter lying around from my Caine battlegroup, since I replaced it with a grenadier chassis, and a plastic Cygnar battlegroup box that Privateer Press gave away at Adepticon one year. I thought they would work well as battlefield rubble. Having a well-stocked bits box is a godsend for more ambitious projects.

khador_destroyer_4

Even though the models in this battlegroup are all painted using metallics, I used nmm to paint the destroyed Cygnar models on their bases. I did this for a few different reasons. First, I thought it would be fitting for the destroyed Cygnar jacks to be less shiny than the Khador ones, which were already quite gritty and corroded. Second, I thought it was a nice callback to the Nemo I’d entered in a prior year. And finally, I wanted to show off that I can paint both metallics and nmm (since many painters seem to stick with one or the other).

khador_destroyer_5

This worked well with the extremely scratched effect I did for the turquoise parts, to make the Cygnar ‘jacks look extremely beat up and damaged, but in a completely different way from the Khador ‘jacks.

khador_juggernaut_1

To get the bright glowing effect for the ‘jack visors, I first filled them almost entirely with green stuff, since normally there’s a big recess there. It’s very difficult to paint a believable glow effect in a deep recess, since you’re fighting against the shadow that the recess creates. Filling it first makes painting a glow much easier.

khador_juggernaut_2

The rust drips are going “down” in different directions. I imagined that the rust would drip down and collect most with the ‘jack in its resting pose, and I tried to imagine what that would be when painting the drips.

khador_juggernaut_3

The Khadoran runes on the ‘jacks’ shoulders read “Br’er Fox” and “Br’er Bear,” named after the main antagonists in the traditional Br’er Rabbit stories. The Cygnaran runes on the hunter’s shoulder pad say “Fire.” Warmachine faction fonts can be found here.

khador_juggernaut_4

I painted the Juggernaut first, and I think it came out slightly better. Normally the models I paint later, once I’ve figured out my color scheme, turn out better, so this is unusual. But I think playing around with the whites a bit added an extra bit of texture and randomness that worked really well with the effect I was going for. It’s much easier to create randomness by accident than intentionally.

khador_juggernaut_5

I painted Sorscha last, and she is much cleaner than the ‘jacks. I imagined the armor of a powerful and important warcaster would be carefully tended, unlike the warjacks.

khador_sorscha_1

I left off the ice-formation base she comes with, since it wouldn’t match the other bases, and instead sculpted something to match, using the head that belongs to the hunter on the juggernaut’s base.

khador_sorscha_3I said in my previous post that I’m planning to teach a class on painting “tricky colors”—white, black, and red—at KublaCon and again at Gen Con. I think I can consider my street cred for teaching that class pretty well established.

Abalám

I finished painting this sweet little bust from Hera Models. I might still tweak a few things, so if you have any comments or critiques, please let me know in the comments!

abalam-3

The more I paint busts the more I find I enjoy them. They are large enough to give you lots of room to work and play with things like textures and freehand, but they still paint up very quickly, and you can focus on the fun bits like the face.


abalam-2

Abalám ended up quite close to my initial vision. There were only two minor changes that happened as I painted. Originally I planned to have an Oni Kanji on his breast plate. I tried painting it three times, once in red, once in black, and once in gold, and each time I decided I wasn’t really happy with it; eventually I ended up just painting over it and bringing back the beaten metal texture I had. The other change was the shirt, which was originally painted as brown leather, then became yellow, then green, before finally ending up as black cloth.

abalam-1

Unfortunately the large metallic areas make this guy difficult to photograph. This set of photos came from my third attempt. I’m still not entirely happy with them, but they’re a big improvement over the first two sets.

abalam-4

The lighting study I did before priming him didn’t end up being quite as helpful as I hoped, but I did make some use of it. I wanted the red glow to be much stronger than the one in the study (which was just reflected light from a red coffee mug, not an actual red light source). Still, it’s a useful trick and I recommend it for anyone who has difficulty painting lighting effects.

I’m really looking forward to my next bust!

Steampunk Leia—finished

Sorry I’ve been so quiet lately. The holidays are always a busy time of year, and this will be my last post of the year.

In honor of Star Wars, I’m finally posting the finished shots of Steampunk Leia. I posted the initial WIPs over a year ago, and finished her last summer, but it took a long time to finally post photos. Sorry!

Without further ado, here are the pictures.

steampunk-leia-2

steampunk-leia-1

steampunk-leia-6

steampunk-leia-5

steampunk-leia-4

steampunk-leia-3

After the second WIP post, I ended up painting over all of the non-metallic metals with metallics. At this large scale, I just couldn’t get NMM that I was happy with. I’m much happier with how the metallics turned out. But my favorite part is the orange light effect – I think I learned a lot about how to pull off a realistic glow effect by trying to execute it at this large scale.

Infinity – Iguana

I painted a iguana to go along with my Nomad force. I decided to enter it in the “Machines of War” category at Gen Con, so I painted it to a somewhat higher standard than the other Nomads, which are just painted to a fast gaming standard.

iguana1

I still took a lot of shortcuts though – for example, the blending on the black is not very smooth.

iguana2

Like the other Nomads, this is painted in an Aleph color scheme (which confused a couple of people at Gen Con).

iguana3

As an extra detail, I painted a lot of warning labels everywhere, sort of like you see on fighter jets.

iguana4

Here’s a group shot with my other Nomads.

nomads

My iguana was awarded a silver, and took first place in the “Machines of War” category.

« Older posts

© 2025 Light Miniatures

Theme by Anders NorenUp ↑